How To Install WordPress on Contabo VPS (WITHOUT cPanel)
Many people feel discouraged about using WordPress, I am here to tell you that it’s not so complicated. In this article, I’ll show you the ultimate guide to install WordPress on the Contabo VPS server with LAMP without using cPanel or Webmin. So, you can save your cPanel monthly costs and Webmin Resources that are not required.
You can also set up flexible blogs or websites by using WordPress which is the most important CMS on the internet. CMS stands for a content management system which is computer software or application that manages all the content by using databases. The main use of CMS is in website development which is free and accessible to everyone.
Why and What is Contabo VPS?
As you can see WordPress is a Web Application so it is clear that it is hosted somewhere publicly. If you’re wondering what is mean by hosting then don’t panic here is the panic removal.
Basically, when the files or databases uploaded on a public server it can be accessible to everyone online over the internet. In simple words, website comprises the code or images are made by web hosting and available for viewing online.
Hosting Options.
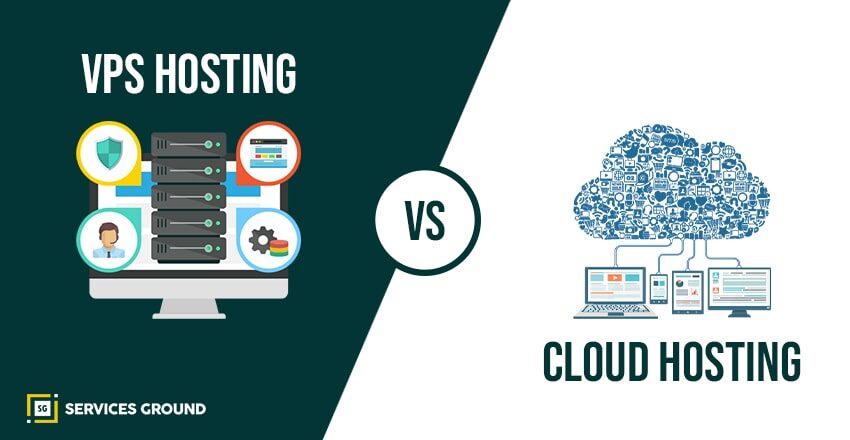
Now, if you want to host WordPress or web application, then you will get two options:
Shared Hosting:
The first option is shared hosting, which means you can use hosting services like Godaddy, Bluehost, Hostinger, and so on. Using these services, your website will be hosted on the same server where other websites are being hosted.
VPS Hosting
The second one is VPS hosting where you can host your website on your own. So, in this setup, you’ll only have your server and that server is called VPS or a Virtual Private Server.
Which one is better?
Now, you have two options whether to choose to host your website on your own or hosting your website by the service providers. But here, I’ll not go in-depth because obliviously, in a few words, VPS is the better option contrary to the shared hosting. Wouldn’t be good if you’ll have your server with manageability and better performance.
You can use Contabo VPS services which is a lot cheaper than Shared hosting. You can start Contabo VPS services with a 3.99 € per month only however, shared hosting has the same price for almost 90% of its services.
But there is a drawback of using the VPS server here, which is that it needs some technical skills for configuration and building the Contabo VPS server. So, I am going to show you how to set up and simply configure the Contabo VPS server in this step-by-step guide.
Install WordPress on Contabo: Let’s Start!
So, in our scenario, we are going to install WordPress on Contabo VPS and you can install it on your desire server.
Get a Domain Name
If you’re ready to install WordPress then first you’ve to get a domain for your website which as simple as a piece of cake. All you have to do is go to any registered company like Digital ocean Godaddy, Enom, Freenom, Namecheap… and getting a domain will cost you only 1$ per year.
If you’re wondering which domain you should buy then I’ll recommend to get a .com domain which can be suitable for your business. If you’ve already one then skip this and move on to get a VPS Server.
Get a VPS Server From Contabo.
1: Open Contabo Website.
Now, get ready to get a VPS Server from Contabo so, first, open your web browser and navigate to the VPS Page of Contabo.
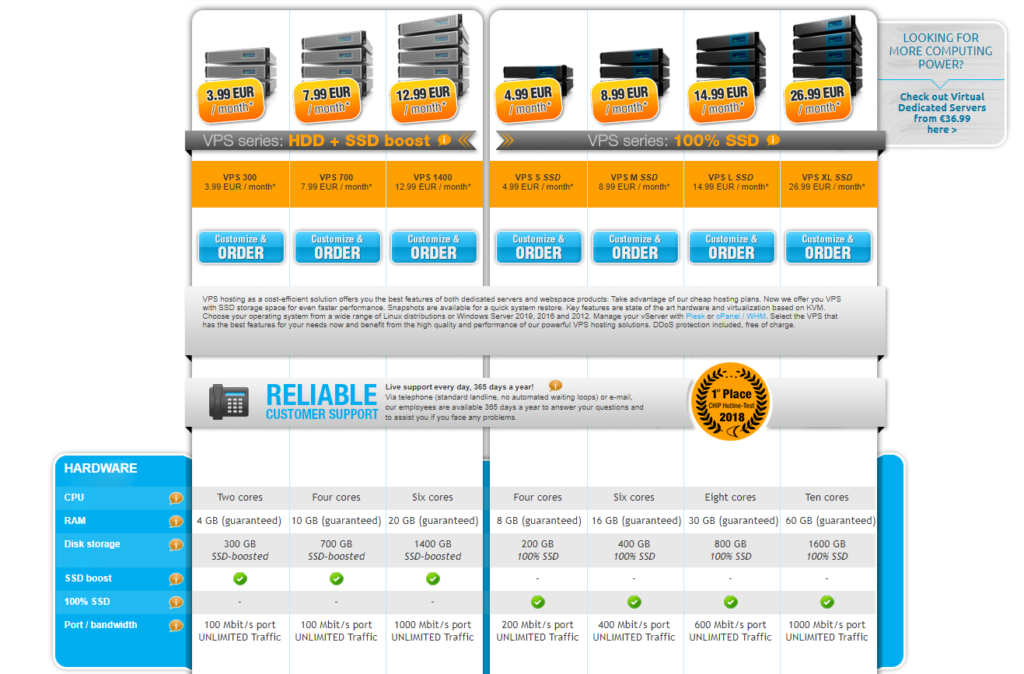
Here, you can see the multiple VPS configuration to start with. But simply, choose the cheapest option to start with. Then install the WordPress on a Contabo.
Later on, if your business grows up, you can get the standard VPS with high resources to scale up.
2: Set VPS Options
So, now move to the next page, where you’ll be required to select some options.
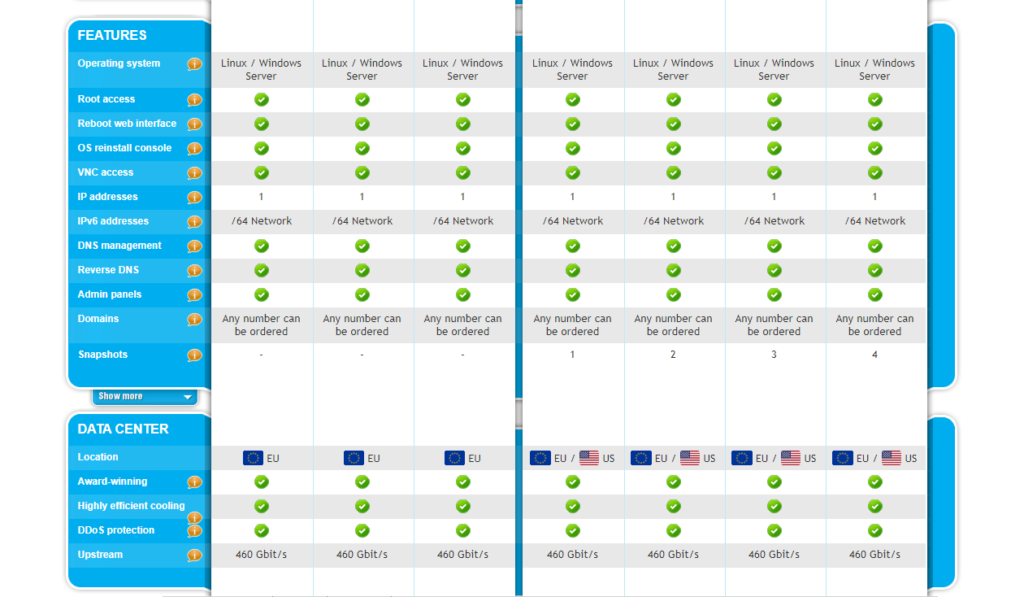
In the Operating System Option, Select Ubuntu 18.04
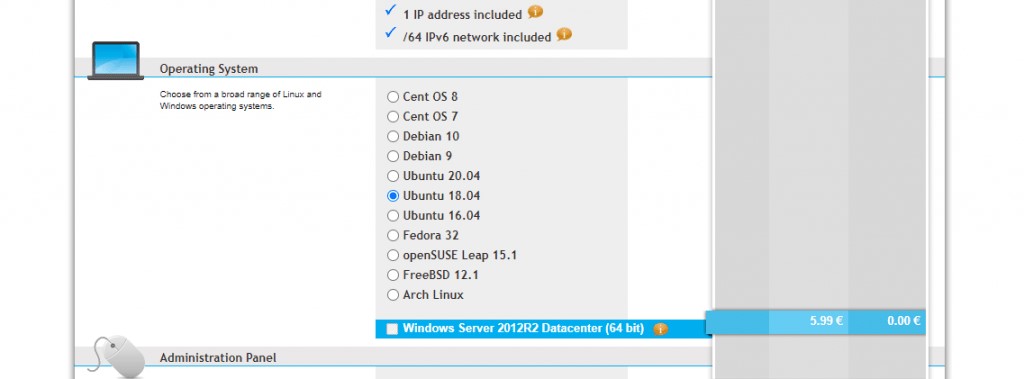
Then in the Administration Panel, Select LAMP

And choose the last option in the Add-Ons, which is “Individual reverse DNS”
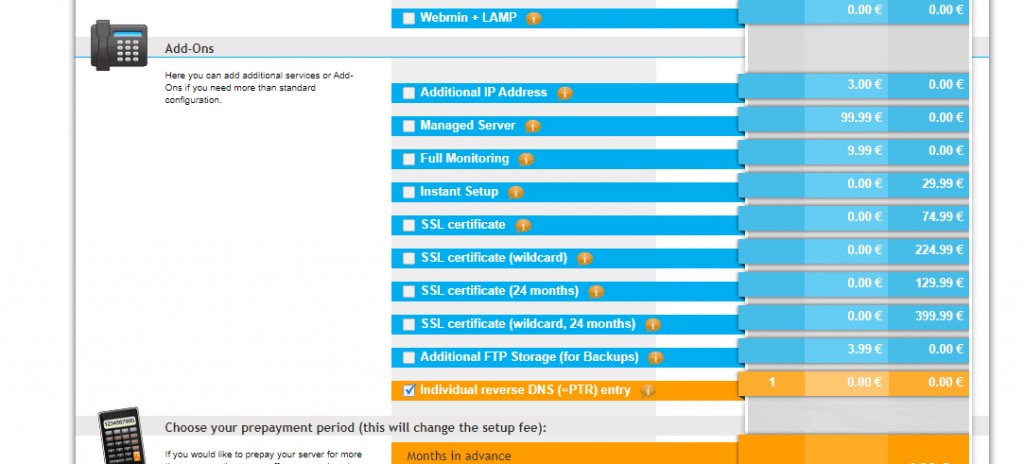
If you are allowed to enter the PTR record, then enter your domain name, and that’s it. Just continue to the billing page and confirm your order there. The other steps are not much difficult and self-explanatory.
Then after completing the rest of the steps, the Contabo team will send details to your emails after building your server.
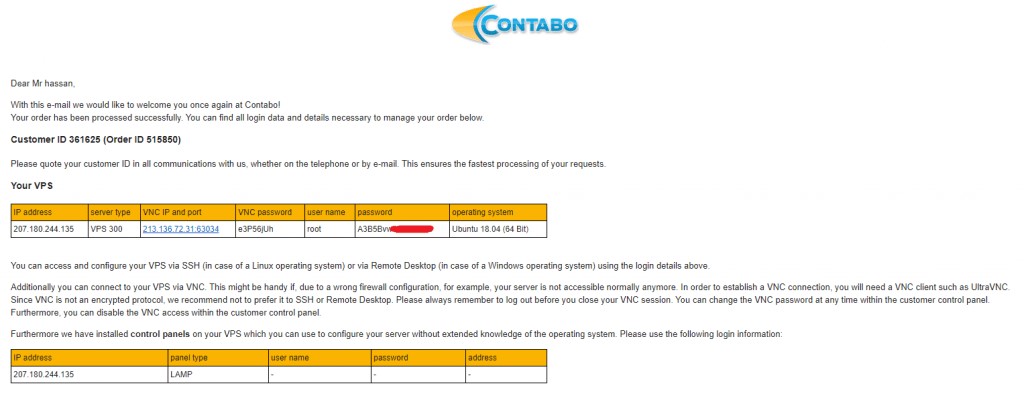
Great! Now you have got your server.
Map Domain Name to your VPS Server.
Now, let’s repeat what we have got? We have a domain and a VPS Server. But there is still a little problem here, is that they both are not connected!
In simple words, we have an IP address sent by Contabo Team through which we can access our VPS Server. But obviously, we want to use a domain name to access our WordPress website.
To do so, we’ll map the domain name to our VPS IP, so we can use the domain name to access the VPS and the WordPress website.
So simply, we are going to map the domain name to our VPS IP, so then we access the VPS and the WordPress website through both the domain and the IP.
Configure your DNS Records:
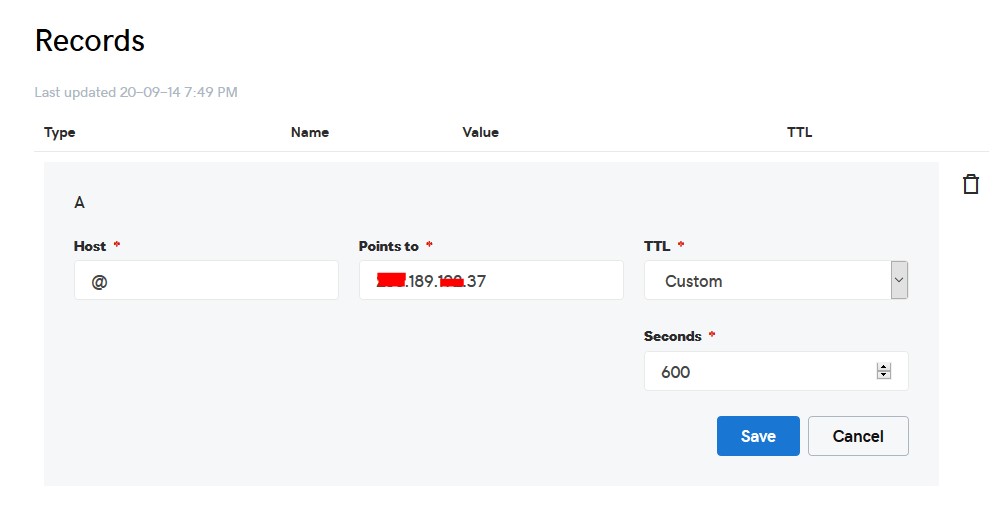
Now configure your DNS records by opening the DNS management zone in your Domain provider and do some editing in Records like this:

- Host: @
- Points: YOUR SERVER IP.
Install WordPress on VPS.
Now our server is ready to install. So, let’s connect to our server to start the further process.
You can connect to your server by using any SSH client like putty.
All you just have to do is open putty and enter your server IP or Name. Then it’ll ask you to log in so, enter your “root” and the password which will be sent to you by email.
Now we’re in the game so we’ll move step by step to install the WordPress.
Step 3 – Creating a MySQL Database and User for WordPress
WordPress uses MySQL to configure, store user, and site information. So, the good news is that we have already installed MySQL as part of the LAMP Stack, but despite that, we need to make a user and a database to use WordPress.
So, login to the MySQL root account by running this command:
mysql -u root -pAfter login, you will be prompted for the root password, so just do copy-paste and go for the Enter button.
Then create a separate database which will be in the full control of WordPress. You can rename this as you like but here we’ll use wordpress to keep it simple so, run this command to create the database for WordPress.
CREATE DATABASE wordpress DEFAULT CHARACTER SET utf8 COLLATE utf8_unicode_ci;Then we’ll create a separate user account of MySQL in order to operate our database exclusively. You can change the name whatever would you want so feel free to change this.
Now we’ll create this account and grant access to the database we created before and remember to choose a strong password. So, we can do this by running the following command:
GRANT ALL ON wordpress.* TO 'wordpressuser'@'localhost' IDENTIFIED BY 'enter_a_custom_password_here';Now, you got a database and user account and each of them is made specifically for WordPress. To get to inform the MySQL about the recent changes we’ve made by flushing the privileges, we’ll run the following command:
FLUSH PRIVILEGES;Exit out of MySQL by typing:
EXIT;It’s done. Great!
Step 4 – Installing Additional PHP Extensions.
WordPress and many of its plugins get benefitted by the PHP extensions. We’ll use the following command to download and install the PHP extensions.
sudo apt updateThen:
sudo apt install php-curl php-gd php-mbstring php-xml php-xmlrpc php-soap php-intl php-zipIn order to load these new extensions, we’ll restart the Apache web service in the next sections. In fact, you can restart the Apache now after installing the additional plugins by running the following command:
sudo systemctl restart apache2Downloading WordPress
After we’ve done the configuration, we can download and set up WordPress. For security reasons, I do recommend to get the latest version of WordPress from their site.
Then Download WordPress Files:
curl -O https://wordpress.org/latest.tar.gzExtract the compressed file:
tar xzvf latest.tar.gzSo, we’ve done almost everything we need, but the rest is we need to attach thins together.
Step 5 – Adjusting Apache’s Configuration
Now we’ve installed WordPress, so to access our website through the domain name, we need to configure apache. So, open WinSCP and navigate to this directory: /etc/apache2/sites-available/
Now create a new file and rename it with “domain.conf” (Change “domain” to your domain)
Then open the file and copy-paste the content below:
<VirtualHost *:80>
     ServerAdmin admin@domain
     DocumentRoot /var/www/html/
     ServerName domain
     ServerAlias domain

     <Directory /var/www/html/>
        Options +FollowSymlinks
        AllowOverride All
        Require all granted
     </Directory>

     ErrorLog ${APACHE_LOG_DIR}/error.log
     CustomLog ${APACHE_LOG_DIR}/access.log combined

</VirtualHost>
Enable configuration in apache and restart the service
Now simply, run the following commands to finish the setup:
sudo a2ensite domain.confsudo a2enmod rewritesudo systemctl restart apache2.service Great!
Step 6 – Configuring the WordPress Directory
You first need to adjust some items in the directory before opening the WordPress in the browser.
Adjusting the Ownership and Permissions
One of the big thing in configuring the directory is the accomplishment in setting up the reasonable file permissions and ownership.
So, start the adjustment by giving the ownership of all the files to the www-data user and group. And Apache needs this to read and write the WordPress files to perform automatic updates.
Update the ownership with chown:
sudo chown -R www-data:www-data /var/www/htmlNext, we will set the correct permissions on the WordPress directories and files by running these two find commands to
sudo find /var/www/html/ -type d -exec chmod 750 {} \;sudo find /var/www/html/ -type f -exec chmod 640 {} \;To get started there should be some reasonable permission set. We might require additional tweaks for some plugins and procedures.
Setting up the WordPress Configuration File
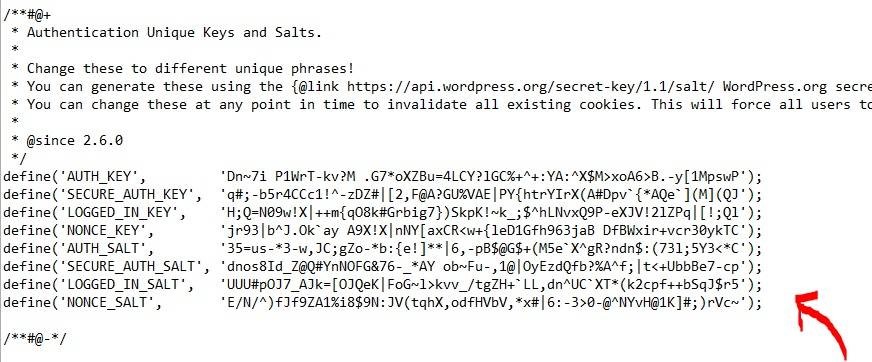
Now, we need some changes in the main WordPress configuration file. When we open the files, first we will add some security keys to provide some security. So, don’t have to come up for security keys because WordPress is already providing a secure generator for these values.
To grab secure values from the WordPress secret key generator, type in putty:
curl -s https://api.wordpress.org/secret-key/1.1/salt/You will get back unique values that look something like this:
Outputdefine('AUTH_KEY',         '1jl/vqfs<XhdXoAPz9 DO NOT COPY THESE VALUES c_j{iwqD^<+c9.k<J@4H');
define('SECURE_AUTH_KEY',  'E2N-h2]Dcvp+aS/p7X DO NOT COPY THESE VALUES {Ka(f;rv?Pxf})CgLi-3');
define('LOGGED_IN_KEY',    'W(50,{W^,OPB%PB<JF DO NOT COPY THESE VALUES 2;y&,2m%3]R6DUth[;88');
define('NONCE_KEY',        'll,4UC)7ua+8<!4VM+ DO NOT COPY THESE VALUES #`DXF+[$atzM7 o^-C7g');
define('AUTH_SALT',        'koMrurzOA+|L_lG}kf DO NOT COPY THESE VALUES  07VC*Lj*lD&?3w!BT#-');
define('SECURE_AUTH_SALT', 'p32*p,]z%LZ+pAu:VY DO NOT COPY THESE VALUES C-?y+K0DK_+F|0h{!_xY');
define('LOGGED_IN_SALT',   'i^/G2W7!-1H2OQ+t$3 DO NOT COPY THESE VALUES t6**bRVFSD[Hi])-qS`|');
define('NONCE_SALT',       'Q6]U:K?j4L%Z]}h^q7 DO NOT COPY THESE VALUES 1% ^qUswWgn+6&xqHN&%');
Paste these lines into the configuration file to set secure keys. Then open the file with WinSCP and replace the line like in the image given below:
Step 7 (last step) – Completing the Installation Through the Web Interface.
Now, we have completed the configuration process and the installation process can be completed through web interface.
In your web browser, navigate to your server’s domain name or public IP address:
http://server_domainSelect the language you would like to use:
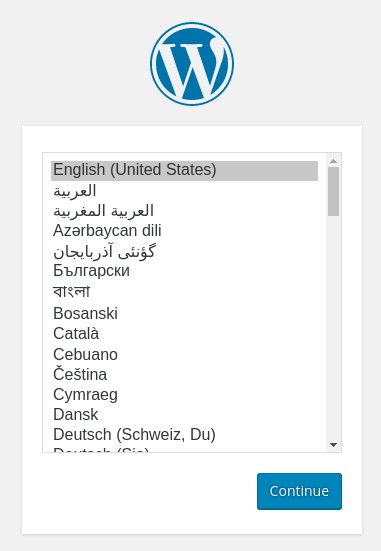
Great! This is WordPress Installed and ready on Your Contabo VPS!
Thanks for Reading.
Also Read
Grow Your Business Faster then you Think
If you want to read more of these, please subscribe to our newsletter and follow us on Facebook, Youtube, Linkedin, and Twitter.