
Cropping photos is far and one of the most common, day after day uses for Photoshop. It’s so common that Photoshop comes with a tool designed specifically for cropping photos, conveniently named the Crop Tool. One of the great things about the Crop Tool is that you can easily crop your photos to common photo sizes like 4×7, 5×8 or 9×10 simply enter the width and height values into the Options Bar before dragging out your cropping border, or by choosing a preset crop size from the Preset picker.
Step 1: Select the Entire Photo
The very first thing we need to do is to choose our entire image. Go up to the Select menu at the top of the screen and select all at the top of the list, or use the Ctrl+A (Win) / Command+A (Mac) keyboard shortcut. Both way you select the entire image, and in the document window you will see a selection outline shown around the edges of the image:
Step 2: Choose “Transform Selection” From the Select Menu
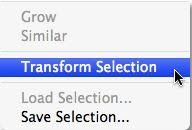
Now, with a selection outline around the entire photo, go back to the Select menu again, and this time chooses Transform Selection near the bottom of the list:
Step 3: Resize the Selection
As its name implies, the Photoshop Transform Selection command allows us to make changes to the selection outline itself without affecting anything inside the selection. In this case, we want to re-size the selection outline and make it smaller until it surrounds only the part of the photo that we want to keep, allowing us to cut everything else away. To resize the selection, hold down the Shift key, then click any of the handles (small squares) in the corners of the selection, and drag the corner to the inside. Holding down the Shift key forces the width-to-height aspect ratio of the selection to remain the same as dragging.
Which is what makes it possible to maintain the same aspect ratio as the original photo.
You can also move the selection outline by clicking anywhere inside the selection and dragging it to a new location.
Just don’t click on the small target symbol in the center of the selection, otherwise, you’ll move the target symbol, not the selection.
Continue to move and change the selection as needed until only the area you want to keep is around:
When you’re done, press Enter to accept the transformation.
Step 4: Crop the Image
At this point, all that remains to be done is to crop the area outside our selection! We can use the Photoshop Crop command to do that. Go to the Image menu at the top of the screen and choose Crop:
Go to Image > Crop, please.

As soon as you select Crop, Photoshop goes ahead and harvests everything that falls outside the selection, leaving us with a cropped version of the photo that maintains the exact same aspect ratio as the original:
To remove the selection outline, either go back to the Select menu and choose Deselect or use the Ctrl+D (Win)/Command+D (Mac) keyboard shortcut.
If you liked this article, please subscribe to our YouTube channel for more videos and tutorials!